Day Events

Batomon Day Events
Choices & Text.

Read all 15 Batomon Showdown day events in Steam build 26170127. Each entry shows the game's description and option labels. Outcomes depend on your run.

About the titles: the game does not name these events. BatoForge adds titles to help you find them.

Choosing a reward

What does your run need next?

The entries below show the game's event text and choices. Where those choices leave a reward unspecified, check its details in-game.

01 // Shared benefit

Second Chance changes the extra reward.

All three Second Chance choices give a life. Choose between the extra Trinket, monster or charm. An empty slot makes a recruit more useful; a settled six-unit board may prefer a reward it can use without replacing a core.
02 // Remaining runway

Final-battle preparation needs an immediate use.

The dragon, statue and charm are offered for the final battle. Choose for the fight in front of you: there are no later days for a slow economy payoff. Inspect the reward details available in your run before choosing.

03 // Recruit or resource

A hoard choice still needs a destination.

Dragon Nest offers an egg, coins or a sword. Fossil Discovery lets you revive, keep or sell the fossil. Think about where a recruit would fit and what extra gold could buy. The exact monster and payout are not shown in these event descriptions.

04 // Reward details

Check the result in-game.

The inventor's Gold-o-matic, a rainbow berry and a meteor share names with Trinkets. The event choices alone leave their effects unspecified. Read the reward you receive before using a Trinket's stats to plan around it.

Baby Basilisk event artwork

Baby Basilisk

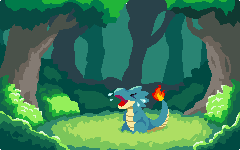
In the middle of a forest, you come across a crying baby basilisk monster. It seems it has gotten lost from its parents.

  1. Adopt it
  2. Help it find its parents
  3. Claim the missing Batomon bounty

Choosing: You can adopt the baby, help it, or claim a bounty. The description leaves the rewards unspecified, so check any further details in the event before deciding.

Bug Collector event artwork

Bug Collector

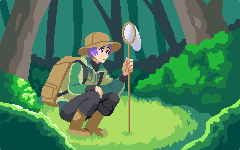
You run into a bug collector. He offers to share with you one of the bugs he has caught today.

  1. Take the fighter ant
  2. Take the gold beetle
  3. Take the boxing mantis

Choosing: Compare the fighter ant, gold beetle and boxing mantis with the roles and duplicates your team needs. Their nicknames leave the exact species and abilities unstated here.

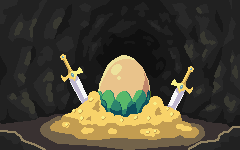
Dragon Nest event artwork

Dragon Nest

You stumble upon a dragon's hoard. Take something before the dragon comes back!

  1. Take the egg
  2. Take the coins
  3. Take the sword

Choosing: An egg needs a place in your plans; coins can help with the next purchase. Check the actual reward before committing—the hatch details, coin amount and sword effect are not listed here.

Dragon Tamer event artwork

Dragon Tamer

You run into a traveling dragon tamer. He says he has too many dragons to take care of and offers you to adopt one.

  1. Adopt the one with the big horn
  2. Adopt the one with the crown
  3. Adopt the long one

Choosing: All three options are adoptions. Decide which current unit you could replace, then inspect the recruit’s details in-game; a big horn, crown or long body does not tell you its ability.

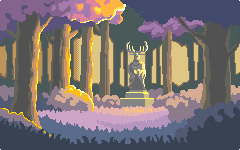
Dryad Statue event artwork

Dryad Statue

You explore deep into the woods and find a statue with a glowing gem embedded in its head.

  1. Pray to it
  2. Take the gem
  3. Gently touch it

Choosing: Pray, take the gem, or touch the statue. The description does not reveal the rewards for these actions.

Endless Boss Prep event artwork

Endless Boss Prep

You've finally made it this far. You might need one of these for the final battle

  1. Take the dragon
  2. Take the statue
  3. Take the charm

Choosing: This reward is for the final battle. Compare the dragon, statue and charm for what helps immediately; a benefit that needs later days has no time to pay off.

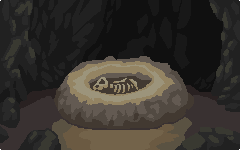
Fossil Discovery event artwork

Fossil Discovery

You discover a winged fossil deep inside a cave.

  1. Take it to a lab and revive it
  2. Keep it
  3. Sell it

Choosing: Revive, keep or sell the fossil according to what your team needs next. Leave room for a recruit if you choose revival. The species and sale price are not shown here.

Genius Inventor event artwork

Genius Inventor

You encounter a genius inventor. He asks if you want to test any of his new inventions.

  1. Test the Recombobulator
  2. Test the Shockify Ray
  3. Test the Gold-o-matic

Choosing: Choose a machine to test. The event text names Recombobulator, Shockify Ray and Gold-o-matic but leaves the results unstated; inspect the result before applying a similarly named Trinket’s effect.

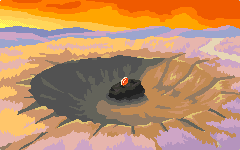
Meteor Crash event artwork

Meteor Crash

You see a meteor fly through the sky and then crash nearby. You rush over to see the meteor with a glowing gem embed in it.

  1. Touch the glowing gem
  2. Mine the meteor
  3. Take some meteor debris and sell it

Choosing: You can touch the gem, mine the meteor or sell debris. Reward amounts are not shown. Check the result of mining before treating it as the Meteorite Trinket.

Pond Fairy event artwork

Pond Fairy

As you stroll through the forest, a blue fairy monster emerges from a nearby pond. The fairy says it will grant you a wish.

  1. Wish for fame
  2. Wish for wealth
  3. Capture the fairy

Choosing: Choose fame, wealth or capturing the fairy. The description names those goals without giving a reward amount or the fairy’s species.

Professor Encounter event artwork

Professor Encounter

You run into a monster professor who's out doing research. He asks if there is anything you need help with?

  1. Get advice on monster training
  2. Ask about his research
  3. Get investment advice

Choosing: Training, research and investment offer different kinds of help. Compare any further details with your current upgrade or gold needs; the option labels leave the exact rewards unstated.

Rainbow Berry event artwork

Rainbow Berry

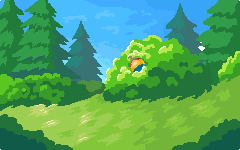
As you wade through the forest, you stumble upon a berry bush. In the bush is a peculiar rainbow berry.

  1. Feed it to a monster
  2. Take it
  3. Sell it at the market

Choosing: Feed the berry now, keep it or sell it. Check the intended recipient before feeding. The event description leaves the effect and sale amount unspecified.

Second Chance event artwork

Second Chance

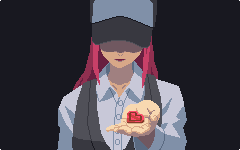
A mysterious trainer approaches. She says, "Don't give up now. You have potential. Take this."

Trainer: Mysterious Trainer.

  1. Accept a life and a trinket
  2. Accept a life and a monster
  3. Accept a life and a charm

Choosing: Every option gives a life. Compare the extra Trinket, monster or charm with what the surviving team needs; an empty slot makes a new recruit easier to use.

Traveling Merchant event artwork

Traveling Merchant

You meet a traveling merchant. He offers you his strange wares.

  1. Take the exotic monster
  2. Take the strange lens
  3. Take the dull-looking gem

Choosing: Inspect the offered effects before choosing between the monster, lens and gem. For the monster, check which slot or merge it could fill. These short labels do not list the effects.

Dryad Statue (Jinto variant) event artwork

Dryad Statue (Jinto variant)

You explore deep into the woods and find a statue with a glowing gem embedded in its head.

The Jinto version uses the same event text and choices as the Pantra event.

  1. Pray to it
  2. Take the gem
  3. Gently touch it

Choosing: As with the Pantra statue, you can pray, take the gem, or touch it. The description leaves the rewards for these choices unstated.